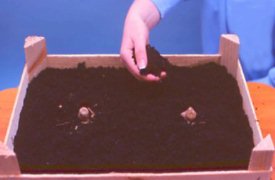
1. Place the tubers in boxes on a layer of moist peat.
HOW TO TAKE CUTTINGS
DAHLIA HOME PAGE
DUTCH
DAHLIAS
DAHLIAS FROM UK
DAHLIAS FROM HOLLAND
WEB SITES
DAHLIA LIST
DAHLIAS FROM NEW ZEALAND
DAHLIAS FROM USA HOW TO GROW DAHLIAS
DAHLIAS FROM AUSTRALIA
DAHLIAS FROM BELGIUM
DAHLIAS
FROM RUSSIA
DAHLIAS FROM
CZECH REPUBLIC
*******************************************************************************
HOW TO TAKE CUTTINGS
FROM DAHLIA TUBERS
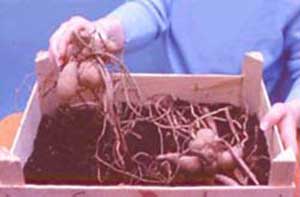
In early spring dahlia tubers
produce young shoots that can be used as cuttings to grow new plants.
To
obtain maximum growth from the new plants, the tubers should be
encouraged into early growth ideally about mid February to March.
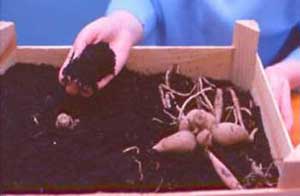
Cover the bottom of a box (a
tomato tray is ideal) with moist peat, then place as many tubers
as will comfortably fit on top.
Cover the tubers almost completely
with moist peat, leaving only their crowns exposed.
Move the
boxes to somewhere with a little warmth to start the tubers
growing, such as a conservatory or warm greenhouse.
With the moisture from the
peat and an average temperature of around 10 degrees C, growth
will start within two or three weeks.
Eyes will appear on the
crown of the tuber, and these eyes will produce the shoots that
can be used for cuttings.
Keep the peat moist while the tuber is growing, but be careful not to
overdo it.
The peat should not become soggy.
Use a watering can with a very fine rose to give you good control over
the amount of water you are supplying.
When the shoots are between 75mm
(3in.) and 125mm (4in.) tall, they are ready to use as cuttings.
First fill some pots, 75mm (3in.) or 87mm (3½ in.) with a potting
compost such as John Innes No. 1 or an equal mixture of peat and sand.
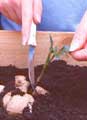
Use a sharp knife to cut away the shoots a little above their base,
where they join the crown.
Take care not to cut the crown itself, which would prevent further
shoots forming.
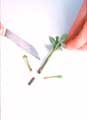
Trim the stem
of the cutting just below the joint of the lowest pair of leaves,
then carefully remove the leaves too, Make sure you do not damage
the joint itself when doing this.
Sometimes these first cuttings have
hollow stems, and I have found them difficult to
root.
Discard them because more shoots will follow, and they
are sure to be more suitable for propagation.
Dampen the
end of the prepared cutting, then dip it in hormone rooting
powder.
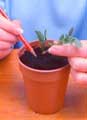
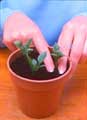
Use a dibber or pencil to make a hole about 25mm (1in.) deep
in the compost ; insert the cutting, and firm it in with your
fingers.
Several
cuttings can be put in the same pot, but it is best to stick to only
one variety per pot.
Ensure each pot is labelled to prevent
confusion.
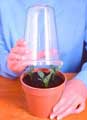
Put a
propagator top over the pots, or put them into a propagating frame. They
need a warm position, out of direct sunlight.
After two or
three weeks, roots will have formed, and when new leaves start
to grow, the plants can be moved onto individual pots of John Innes
No. 2 compost.
Grow the
plants on in these pots until the end of May, then move them to a
sheltered position, such as a sunny patio.
This will help to
harden off the plants before they are planted out in the garden.
Just To See How It Is Done
|
|
|
|
|
|
|
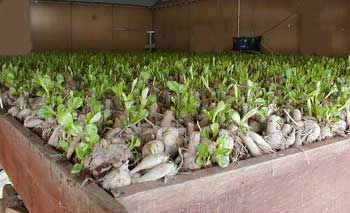
Dahlia tubers set up in the barn
with cuttings ready to take
HOPE THIS HAS BEEN OF SOME HELP
**********************************************************************************************
DAHLIAS UK dahlias uk
For More On DAHLIAS < www.jrg-dahlias.co.uk >
This Is The How To Take cuttings Page Of < www.anglo-dutch-dahlias.co.uk >